Tuesday, May 29, 2012

Drip irrigation

This year I took the next step in converting a lawn into a vegetable garden. See building soil tilth posting for earlier steps in this garden conversion project. This year I removed the pop-up lawn sprinklers and installed drip irrigation to all the veggies.
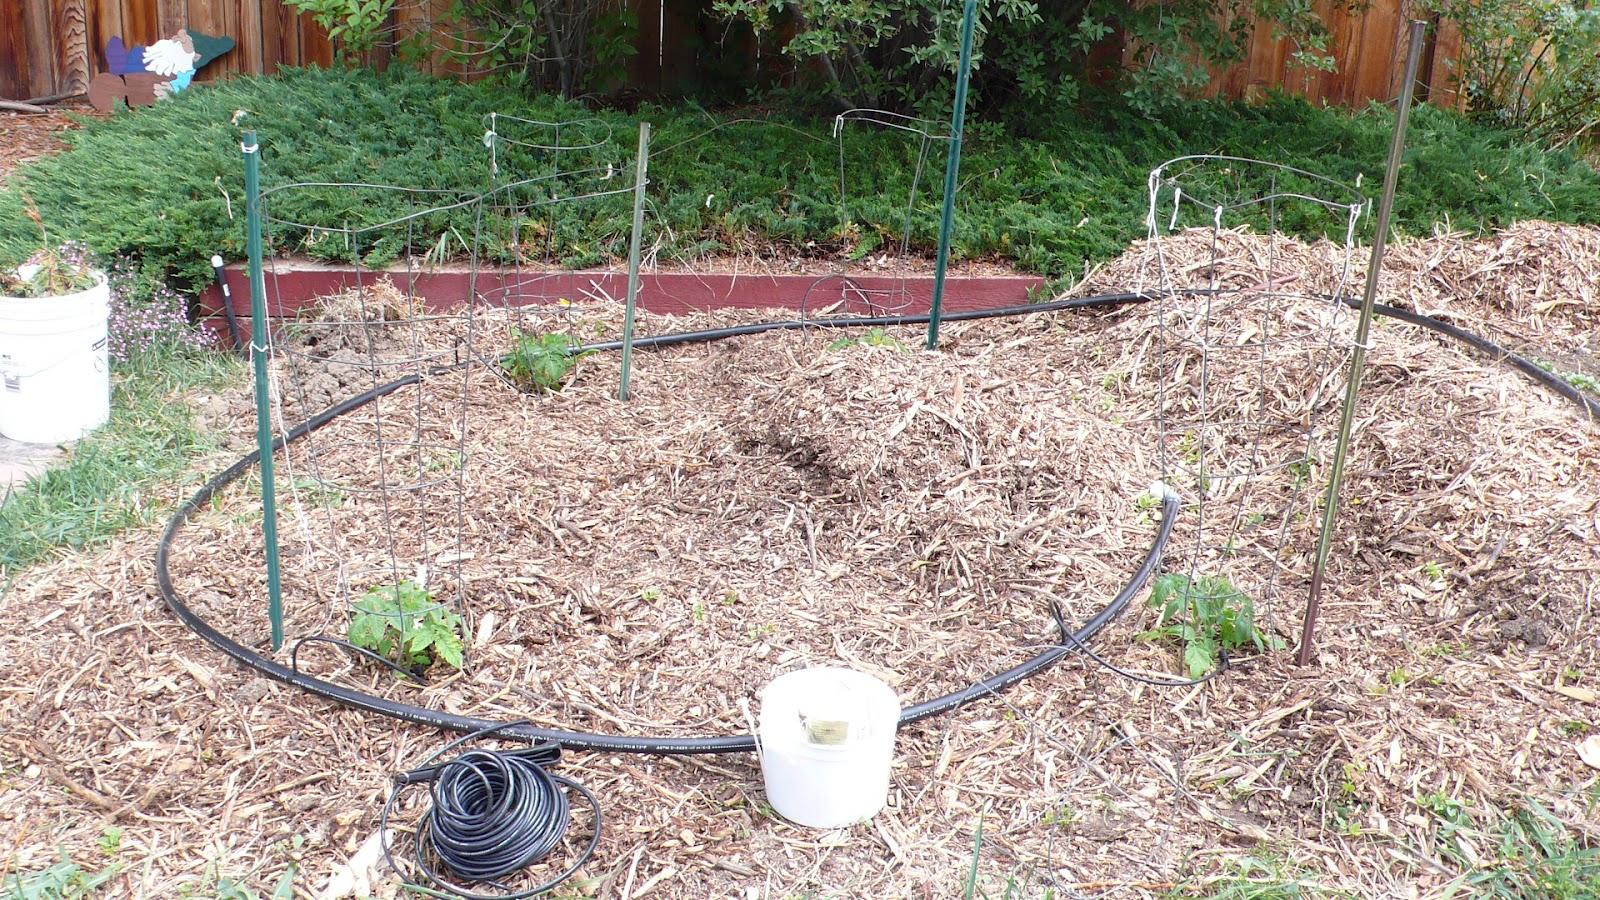
I counted the existing sprinklers and bought new risers 12 to 18 inch long to make sure my new piping was above ground with plenty of room to work around. I'm not sure if I over did the height as I've tripped a couple of times already, but I have a very thick layer of mulch to conserve moisture and help control weeds.
Carrot / radish bed


Carrots radish carrots with sprinklers


I bought several different types of emitters (sprinklers), hose and fittings.


The longer spike on the right has a spray head with a strip pattern. I like this type for my carrots, radish, and corn rows. The smaller pattern sprayers and drippers I used for tomatoes and cucumber. The idea is to put the water only where you want it without buying a zillion different ends. They do make drip hose in both the kind that weeps and some that has holes at regular spacing but I haven't had good luck with those because I cant adjust the flow rate.
To the top of the risers I connected barbed fittings for 3/4" funny pipe. I think its called funny pipe because you can bend it. Since it comes in a pretty tight roll it was never very ""funny" for me even though I left it in the sun for a while. Left on its own it wants to form a circles so I put large rocks and cement blocks on it to help keep it in place. This is the same stuff that is usually buried, in which case the soil will hold it in place.
Taller riser with 90 degree elbow


Then you pierce the 3/4" funny pipe with a nail or the special tool (which is an expensive plastic nail) and insert a 1/4 inch coupler, 1/4" delivery hose, and the emitter you select.


Here is a close-up of a roma tomato with a small spray emitter.


And a shot of the 4 Roma's. They were started indoors from seeds from Botanical Interests. Tomato Bush-Italian Roma. botanical interests italian roma
The package says, "up to 200 fruit per plant" so I'm hoping for 800 juicy babies.
I tried to leave extra length in the 3/4" funny pipe as the design of the garden will change from year to year and while its pretty easy to remove the 1/4" delivery hoses and plug the holes I'll try to reuse everything next year, a plan I wont ever start considering until next winter has me yearning to get back outside.


I have the crimping tool to allow me to use the low cost crimp on hose clamps, but you can see above that sometimes I don't crimp it right the first second or third time and have to use a standard tractor style hose clamp.
I also used different style hose barbs based on my needs, and what I could use without another trip to the hardware store. Several of the risers were not needed and just capped.
Tee fitting


Octopus fitting


After installing all the connectors I turned on the water and adjusted to flow and in some cases the location or direction of each emitter to where I thought it needed to be. These may have to be adjusted as the plants grow and either block the flow or need more water.

Planting Time!


I was busy last week getting seeds in the ground. I also upgraded the irrigation to a "drip" system. The old system was just the in ground lawn pop-up sprinklers. While those worked okay I think they wasted a lot of water and helped weeds by spraying water everywhere. Many plants are hurt by over head watering because the water on the leaves can lead to fungus issues. Though yields didn't seem to be effected, last year the Cocozelle summer squash from Botanical Interest had white powder mildew rather extensively. To be honest I've seen this frequently during the late season on squash, even with weekly applications of compost tea sprayed onto the leaves.
East Garden Plan


While I'm calling this a plan, I actually planted the seeds first then drew the "plan" for record purpose. I like to record where things are planted to help with my crop rotation. Some of the crops, such as beet roots, are in the same place for two seasons because I'm waiting for these biannuals to go to seed, other plants like the yukon gold potatoes are volunteers, meaning I missed some in the ground last fall and they resprouted this year. 
I tried a new system for the silver queen corn. I have planted this variety with great success several years ago at another home in Lakewood, CO. It grew to about 7-8 feet tall. This time I planted double rows, where two rows are spaced 12 inches apart then a 24-30 inch spacing to the next double row. I also planted kentucky pole and kentucky wonder wax pole beans in each double row, finally I planted the waltham butternut squash in the large "center" row. This is known as the three sisters method or system that was practiced by American Indians.
Below is the planted garden with drip system installed.
                      
West Garden May 29, 2012
The written plan actually is only left half, from the brown pot left. The right half was already planted.
Seeds planted week of May 20, 2012
Here are the seed packets I used this week. All of these where started in the ground. The tomatoes show on the plan, and several other tomatoes, were all started indoors several weeks ago. You can see that I have seeds from several different companies, Burpee, Botanical Interest (a local Colorado company), Baker Creek, Livingston, and seeds from last year's Waltham Butternut Squash. This Butternut is really good, I'll try to grow it every year. Another winner in my book is the Marketmore 76 cucumbers from Baker, I only had 6-7 seeds left in this packet from 2010. I planted them at the base of a trellis that worked well last year.
Cucumber trellis
 This year I bought a couple of bags of alfalfa pellets at the feed store and mixed them in the soil with some compost in the cucumber areas. The pellets are a cheap organic fertilizer 3-1-2 NPK based on some research. I found them at 40 lbs for $10.

Garden thief

 My friend above seemed very tame and inspected everything. I finally noticed that he was going for the worms and rolly pollies that I was turning up. I didn't mind the theft of a couple dozen worms and bugs, but I did get ticked when I saw him with a bean seed in his beak. He or she came back in the early evening with the rest of the family, but by that time I had a chance to hose the whole garden down and hopefully protect some of the seeds.

Compost escapees


 Here's part of why the robins were so friendly, although the robin didn't seem interested when they were in the wheelbarrow for some reason. Maybe he was just frightened like me!

Sow and pill bugs